Saturday, July 16, 2011

Introducing the "Share This Groovy Coolness" Gadget for Blogger!


I've just created ANOTHER new widget/gadget to go under every post of your Blogger blog. If you like it, please feel free to add it to your blog!

Before you do this, however, there are a few steps you MUST do (it's easy) before you incorporate this code into your blog:

1.  I would recommend that you make a copy of your template before doing any of this.  You can do this by going to SETTINGS and saving a copy to a file on your computer.

2.  Copy ALL of the code below (IN BOLD) into Notepad or Word some other notemaker software:


<br/>
<br/>
<br/>
<!-- Groovy Chicky Coolness Share Start-->
<a href='http://www.chickthatbytes.blogspot.com'><img alt='' src=''/></a><style>
img{border:0;}
#wrapper{width:488px; height:110px; background-image:url(


https://blogger.googleusercontent.com/img/b/R29vZ2xl/AVvXsEhCoCCKrDHJ9ynkhloZTUbOJn73mlorQq29rXVjv3qX5YzHWqtSXbDej1lP7tEFl17HGmVRGiUHGBsn6lsnkaqAjJdJwZTXe1qdckHl9OHskqQXi5gacpdYxeDeYehub_pA2DsloK8dfbw/s1600/share+this+groovy+coolness.png); position:relative; background-repeat:no-repeat; background-color:transparent;}
#wrapper ul{position:absolute; width:600px; top:42px; left:3px; list-style-type:none;}
#wrapper li{float:left;}
</style>
<div id='wrapper'>
<ul>
<li><g:plusone size='tall'/></li>
<li>
<!-- Facebook button-->
<a expr:href='&quot;http://www.facebook.com/share.php?u=&quot; + data:post.url + &quot;&amp;title=&quot; + data:post.title' rel='nofollow' target='_blank'><img alt='Share On Facebook' height='' src='https://blogger.googleusercontent.com/img/b/R29vZ2xl/AVvXsEjdwnjeg3UpwX9To0jrkpO4dtVBtQMXqpGKEL7KvnjGleQjkWMtryFnqaVMgpNplqNxDc7j_TfxphiLPDs6Y-vg8zCN5mP7rrTNFxsfphVSddgic9EpF_vFDWUPYXM6lIy1I4Jejj63VFI/s1600/facebook.jpg' width=''/></a>
</li>
<li>
<!-- Digg button-->
<a expr:href='&quot;http://digg.com/submit?url=&quot; + data:post.url + &quot;&amp;title=&quot; + data:post.title' rel='nofollow' target='_blank'><img alt='Digg This Post' height='' src='https://blogger.googleusercontent.com/img/b/R29vZ2xl/AVvXsEhwLQUB9bjhlmEg2WNIHSorEYQ6flhXsJyG1ryN-n6bl_n152Y5fEytIkDInhenLrOqc0f1cc_29UWNykZp9u8Rm75GKNUw2VaqOeDULj8coUgBrEMaCJIJMR6iUUQzQEuYI0jWGr2vAS4/s1600/digg.jpg' width=''/></a>
</li>
<li>
<!-- Stumbleupon button -->
<a expr:href='&quot;http://www.stumbleupon.com/submit?url=&quot; + data:post.url + &quot;&amp;title=&quot; + data:post.title' rel='nofollow' target='_blank'><img alt='Stumble This Post' height='' src='https://blogger.googleusercontent.com/img/b/R29vZ2xl/AVvXsEgkdBM9bkLN8xpsAAb_Q2er5cYkD0Rku3-VTe4-5UJzzOhBCc0exkKeHP_B8sY3pIqPJJ5Y0Sca0kbd6WEHRkttOO1pPTzOaxy9zDFxMvcXYD_wrJ5NiyF9LI8w8H2_BU-e5sEPnFVfbh4/s1600/stumbleupon.jpg' width=''/></a>
</li>
<li>
<!-- Twitter button BE SURE TO CHANGE THE NAME IN BLUE TO YOUR TWITTER NAME-->
<a class='twitter-share-button' data-count='vertical' data-via='tkgoforth' href='http://twitter.com/share'>Tweet</a><script src='http://platform.twitter.com/widgets.js' type='text/javascript'/></li>
<br/>
<br/>
</ul></div>
<br/>
<a align='left' href='http://chickthatbytes.blogspot.com/2011/07/introducing-share-this-groovy-coolness.html' target='_blank'><font color='#ff559c' size='small'>CHICKY GROOVY COOLNESS GADGET</font></a><br/>
<!--End Sharing Groovy Chicky Share Gadget http://www.chickthatbytes.blogspot.com-->
<br/><br/>

ONCE THE ABOVE IS COPIED, THEN

3.  Enter YOUR TWITTER NAME in the TWITTER area where my twitter name is (in BLUE) that you pasted into Notepad (or Word, or whatever you used.  [Or, you can GO HERE to TWITTER and set up your twitter button to look different than the one I have.  Be sure to include YOUR TWITTER NAME information.  THEN paste all of that code EXACTLY AS IT IS within the red area.]

4.  Once these things are all done:


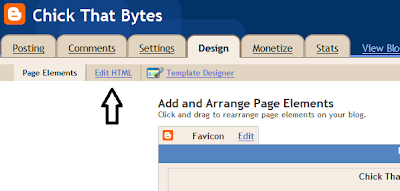
Go to your Blogger Dashboard, and then go to DESIGN. Then go to EDIT HTML. Click on the check box to EXPAND WIDGETS.

Then, on the top of your browser, go to EDIT then FIND (or use ctrl+F).  In the "Find" box at the bottom of your browser, type in <data:post.body/> and then click the "next" button" on the right of it.  (You want to find this code in your template).

Once you find this code, COPY AND PASTE the above code you copied into Notepad (and changed with your twitter name) just after the code. Preview it, and you will find that it will show up below every post!

Let me know what you think!


CHICKY GROOVY COOLNESS GADGET


Friday, July 15, 2011

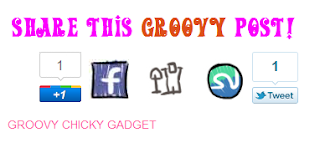
Introducing the Groovy Chicky Share Gadget for Blogger!

I've just created a new widget/gadget to go under every post of your Blogger blog. If you like it, please feel free to add it to your blog!

Before you do this, however, there are a few steps you MUST do (it's easy) before you incorporate this code into your blog:

1.  I would recommend that you make a copy of your template before doing any of this.  You can do this by going to SETTINGS and saving a copy to a file on your computer.

2.  Copy ALL of the code below (IN BOLD) into Notepad or Word some other notemaker software:

<br/>
<br/>
<br/>
<br/>
<!-- Groovy Chicky Share Start-->
<a href='http://www.chickthatbytes.blogspot.com'><img alt='' src=''/></a><style>
img{border:0;}
#wrapper{width:488px; height:110px; background-image:url(https://blogger.googleusercontent.com/img/b/R29vZ2xl/AVvXsEgZ9lDea-m_w0otBrV8Gs9HACGNKD5zxKiunPOVT7UmqTOOs3cD66xewq9Hp265tHGWMrFdtX6lvCyIIz43R4u926E3r_OBmgJURKjyiByyJSfmRgZ5c16mrNCa-bh0ldm4vBbR637bkdQ/s1600/SHARE+THIS+GROOVY+POST.png); position:relative; background-repeat:no-repeat; background-color:transparent;}
#wrapper ul{position:absolute; width:600px; top:42px; left:3px; list-style-type:none;}
#wrapper li{float:left;}
</style>
<div id='wrapper'>
<ul>
<li><g:plusone size='tall'/></li>
<li>
<!-- Facebook button-->
<a expr:href='&quot;http://www.facebook.com/share.php?u=&quot; + data:post.url + &quot;&amp;title=&quot; + data:post.title' rel='nofollow' target='_blank'><img alt='Share On Facebook' height='' src='http://i553.photobucket.com/albums/jj377/goforthjtj/facebook-4.jpg' width=''/></a>
</li>
<li>
<!-- Digg button-->
<a expr:href='&quot;http://digg.com/submit?url=&quot; + data:post.url + &quot;&amp;title=&quot; + data:post.title' rel='nofollow' target='_blank'><img alt='Digg This Post' height='' src='http://i553.photobucket.com/albums/jj377/goforthjtj/digg.jpg' width=''/></a>
</li>
<li>
<!-- Stumbleupon button -->
<a expr:href='&quot;http://www.stumbleupon.com/submit?url=&quot; + data:post.url + &quot;&amp;title=&quot; + data:post.title' rel='nofollow' target='_blank'><img alt='Stumble This Post' height='' src='http://i553.photobucket.com/albums/jj377/goforthjtj/stumbleupon.jpg' width=''/></a>
</li>
<li>
<!-- Twitter button -->
<a class='twitter-share-button' data-count='vertical' data-via='tkgoforth' href='http://twitter.com/share'>Tweet</a><script src='http://platform.twitter.com/widgets.js' type='text/javascript'/></li>
<br/>
<br/>
</ul></div>
<br/>
<a align='left' href='http://chickthatbytes.blogspot.com/2011/07/introducing-groovy-chicky-share-gadget.html' target='_blank'><font color='#ff559c' size='small'>GROOVY CHICKY GADGET</font></a><br/>
<!--End Sharing Groovy Chicky Share Gadget http://www.chickthatbytes.blogspot.com-->
<br/><br/>


 ONCE THE ABOVE IS COPIED, THEN

3.  Enter YOUR TWITTER NAME in the TWITTER area where my twitter name is (in BLUE) that you pasted into Notepad (or Word, or whatever you used.  [Or, you can GO HERE to TWITTER and set up your twitter button to look different than the one I have.  Be sure to include YOUR TWITTER NAME information.  THEN paste all of that code EXACTLY AS IT IS within the red area.]

4.  Once these things are all done, continue....


Go to your Blogger Dashboard, and then go to DESIGN. Then go to EDIT HTML. Click on the check box to EXPAND WIDGETS.

Then, on the top of your browser, go to EDIT then FIND (or use ctrl+F).  In the "Find" box at the bottom of your browser, type in <data:post.body/> and then click the "next" button" on the right of it.  (You want to find this code in your template). 

Once you find this code, COPY AND PASTE the above code you copied into Notepad (and changed with your twitter name) just after the code. Preview it, and you will find that it will show up below every post! 


Let me know what you think!


CHICKY GROOVY COOLNESS GADGET


Monday, July 11, 2011

Wanna Know How To Remove the Blogger Banner from the Top of Your Blog?

If you are like me, you think that the Blogger banner at the top of your Blogger Blog is a little "loud" and somewhat "annoying."    Here is what it looks like (click image to enlarge):


As you can see, I don't have it on my blog anymore, even though this is a Blogger blog.


Want to know how to remove it, quick and easy?

Here's the trick.  Go to your dashboard and click on the "Design" tab.


From there, click on the little box that says "Edit HTML."


From there, scroll down to your blog TEMPLATE DESCRIPTION (this shouldn't be that far down):


 Right after this, and before "/* Variable definitions" you are going to add the following CSS code (copy and paste this): 

#navbar-iframe {
display: none !important;
}


 Be sure to SAVE your work, and check out your blog!  You will like it!

I got this information from the website:  http://blogger-templates.blogspot.com/2005/01/remove-navbar.html.  They have some nice templates you might want to check out!


CHICKY GROOVY COOLNESS GADGET


Thursday, March 10, 2011

Smart Phone Danger! Be aware for your child's safety...

Be sure to watch this video.  It is said that facebook and other social sites remove the EFIX data from the photos, but it's better to be safe than sorry!


CHICKY GROOVY COOLNESS GADGET


Tuesday, March 8, 2011

How to get Social Media Follow Icons in your Sidebar

Ok, it has taken me FOREVER! to try to find a way to put SOCIAL FOLLOW ICONS (particularly the "F" for following my facebook page, and the little twitter bird on the right for following my twitter account.)

I finally figured it out, and here is how you do it:

Add the following HTML code to a HTML gadget (or "text" widget in Wordpress) in your sidebar:


<center><div id="stretch">
<span><a  title="Facebook" target="_blank" href="http://YOUR FACEBOOK PAGE><img width="100px" src="http://YOURIMAGEURL" border="0" alt="" /> </a></span>
<span><a  title="Twitter" target="_blank" href="http://Twitter.com/YOURTWITTERNAME"><img width="100px" src="http://YOURIMAGEURL" border="0" alt="Twitter" /> </a></span>
</div></center>


The RED you replace with YOUR target page (for example, the URL to your facebook page or twitter profile).

The ORANGE you replace with the IMAGE URL that you want to show up.

The BLUE you replace with the size of the image you want.


This was always my confusion...what do you mean IMAGE URL?

The best and easiest way I have found to do this is to open an account at Photobucket (www.photobucket.com).  From here you can download photos, and THEN it provides the links that you add to the code above.

If you like someone's twitter or social icon button, right click it and save it on your computer.  Then, add that image to your Photobucket account.  You can even resize it.  Or, you can just resize it with the size in BLUE above.

I believe that with the particular code above, that you can have the image show up side by side, as well.  Because my gadget is pretty narrow, they lined up one on top of the other.

On the right sidebar you can see how this looks if you use it in a wide gadget or a narrow gadget.

I hope this helps you!


CHICKY GROOVY COOLNESS GADGET


Thursday, February 24, 2011

How To Follow A Friend's Blog For DUMMIES

Friends, we have a problem.  You find a terrific blog, and excitedly press on the "Follow" button, only to be taken into a deep dark hole -- the unknown of the Cyber Underworld.  Quickly, you close the page, your heart beating wildly as you sink back in your chair and think, "Phew!  That was close!"  You are glad you obeyed your instinct and that your computer did not blow up in the process.  You pursue it no further.

OR, you just HAVE to post a comment on a post you thought was hilarious.  The same thing happens.  You pull down on the drop down box, and it gives a myriad of choices.  You see words that you have never laid your eyes on in the past.  It does not compute.  "What do I doooo?!" you exclaim in your brain, and you immediately give up.

Friends, THESE THINGS MUST NOT BE!!!  Your friend writes a blog because your friend wants YOU to follow it.  When their friend follows their blog, other people will see their blog and more traffic will be sent to their blog, which is what your friend wants and needs.  That is how your technically advanced friend finds their way into Cyberspace.  Your friend NEEDS YOU.

Here is your remedy for this, and please understand that there ARE a few steps that you much take on your own, but DO NOT BE AFRAID.  Once you follow these simple steps, you will no longer be an ignorant techno-slug (as my friend Kim calls it), but a well-respected functional, productive, valuable and contributing member of the Techno Society.  Your life will again begin to have meaning.

1.  The FIRST and easiest thing to do is to open a GOOGLE account.  If you already have a GMAIL account, you are set.  If you don't have a GOOGLE account, GO HERE and create one.   With a Google account, not only will you be able to follow blogs, there are a whole bunch of other cool things you can do with your account.  I would suggest "exploring" Google once you get in there.

2.  The next thing is to GO to the blog you want to follow.

3.  From here, there are several different options.

Option A:  

If the blog has a "FOLLOW" with Google Friend Connect, click that.  Lots of blogger want a LOT of FOLLOWERS. 


From here, you will be sent to either a "Sign in to your Google account" message, or to another pages which says:  "ADD TO GOOGLE HOMEPAGE" or "ADD TO GOOGLE READER".  I always use Google Reader, because that's where I like to look at my blogs.

 
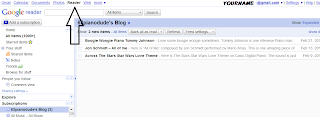
From there you will be taken to Google Reader, where you it will list the blogs you are following, on the left. If there is a yellow message that says, "You have not subscribed to this blog" then click the SUBSCRIBE button and you will be subscribed (which means that you will get all of their blog updates here on Google Reader).

You're done!  You can check back with Google Reader to read the updates.

Option B:  


Sometimes a blogger just has a "Subscribe" button on their blog (in either the right of left side bar) .  Click on the box and another box will open up such as this:


Click on the Add To Google Box, and then continue the steps from Option A.

Option C:


Sometimes a blogger does not have any kind of follow box.  Or, they might have a "Subscribe by Email" area where you enter your email address and the blog entries get sent to you when they are posted.  You can do that, too.

Option D:

If the blog you want to follow does not have a box, but is a BLOGGER (as opposed to WordPress or other type of blog format) you can use the FOLLOW button at the top of the blog itself, IF you have your own blog.   It will look like this if it is a BLOGGER blog:


Once you "follow" this way, it will show up in Google Reader, and also in your BLOGGER account.

AS FAR AS LEAVING COMMENTS:  

I know this is confusing.  You want to leave a comment, but don't know what to do when it asks "Choose An Identity"  You can do one of two things:  You can either sign it via your "Google Account name", (or any of the other options is you have them), or as ANONYMOUS (but you can still leave your name and stuff in the actual content that you write so that your friend will know it was actually you.)

Well, I hope this all makes sense!  Please understand that if you do follow these rules and decide to help your dear friend out and follow their very cool blog so others will have a better chance of finding their blog, not only will you be UBER Cybercool, but you will make your friend VERY happy.

Welcome to CyberWorld!  I know you will like it!

OH...P.S.  Please follow my blog!  (see Follow gadget on the right)....


CHICKY GROOVY COOLNESS GADGET

Wednesday, February 23, 2011

How to cause the Pages gadget to not stretch across the width of the page

With my particular Blogger template, the pink "Pages" gadget originally stretched across the top of the page like this:


I didn't really like this, so I found this great tutorial on how to make it stretch only across the width of my actual postings (as the page looks now). 


This is taken from:
http://www.southernspeakers.net/2011/01/blogger-pages-gadget-no-stretch.html


Place the following code directly above "HEADINGS" in your HTML: 


/*--Pages Gadget No-Stretch Starts--*/
.tabs-outer {
background: transparent !important;
}

.cap-top, .cap-bottom{
border: none !important;
}

.tabs-inner .widget li a{
border: none !important;
border-right: 1px solid $(tabs.border.color) !important;
}

#crosscol{
background: $(tabs.background.color) $(tabs.background.gradient);
border: 1px solid $(tabs.border.color) !important;
}
/*--Pages Gadget No-Stretch Ends--*/

/* Headings
----------------------------------------------- */


CHICKY GROOVY COOLNESS GADGET


T.K. Goforth is a musician and author of the well-received book "Chord Piano is Fun!" She also writes a music blog called "Chord Piano Chick's Mostly Musical Musings.
Chord Piano Is Fun